

1. Start a sim session
2. Pick a robot and a scene
The wizard opens with a New Sim Session card that fills in as you pick. First, the robot — tabs group them by form factor (←/→ to switch tabs):{robot}-{scene}-{date}-{time}) — press enter to
launch. If you want to see exactly what you’re deploying, press e at any
step: the session config opens as YAML in your editor, and your edits carry
into the launch.
3. Watch it boot
- The statusline at the bottom now shows
●with your session name — green means this shell has a live session attached. - The UI link is durable. Close the tab, reopen the link — same session.
4. It’s alive
The workspace is VS Code in your browser, running on the session pod. On first open it asks “Do you trust the authors of the files in this folder?” — this is your own session workspace, so choose Yes, I trust the authors.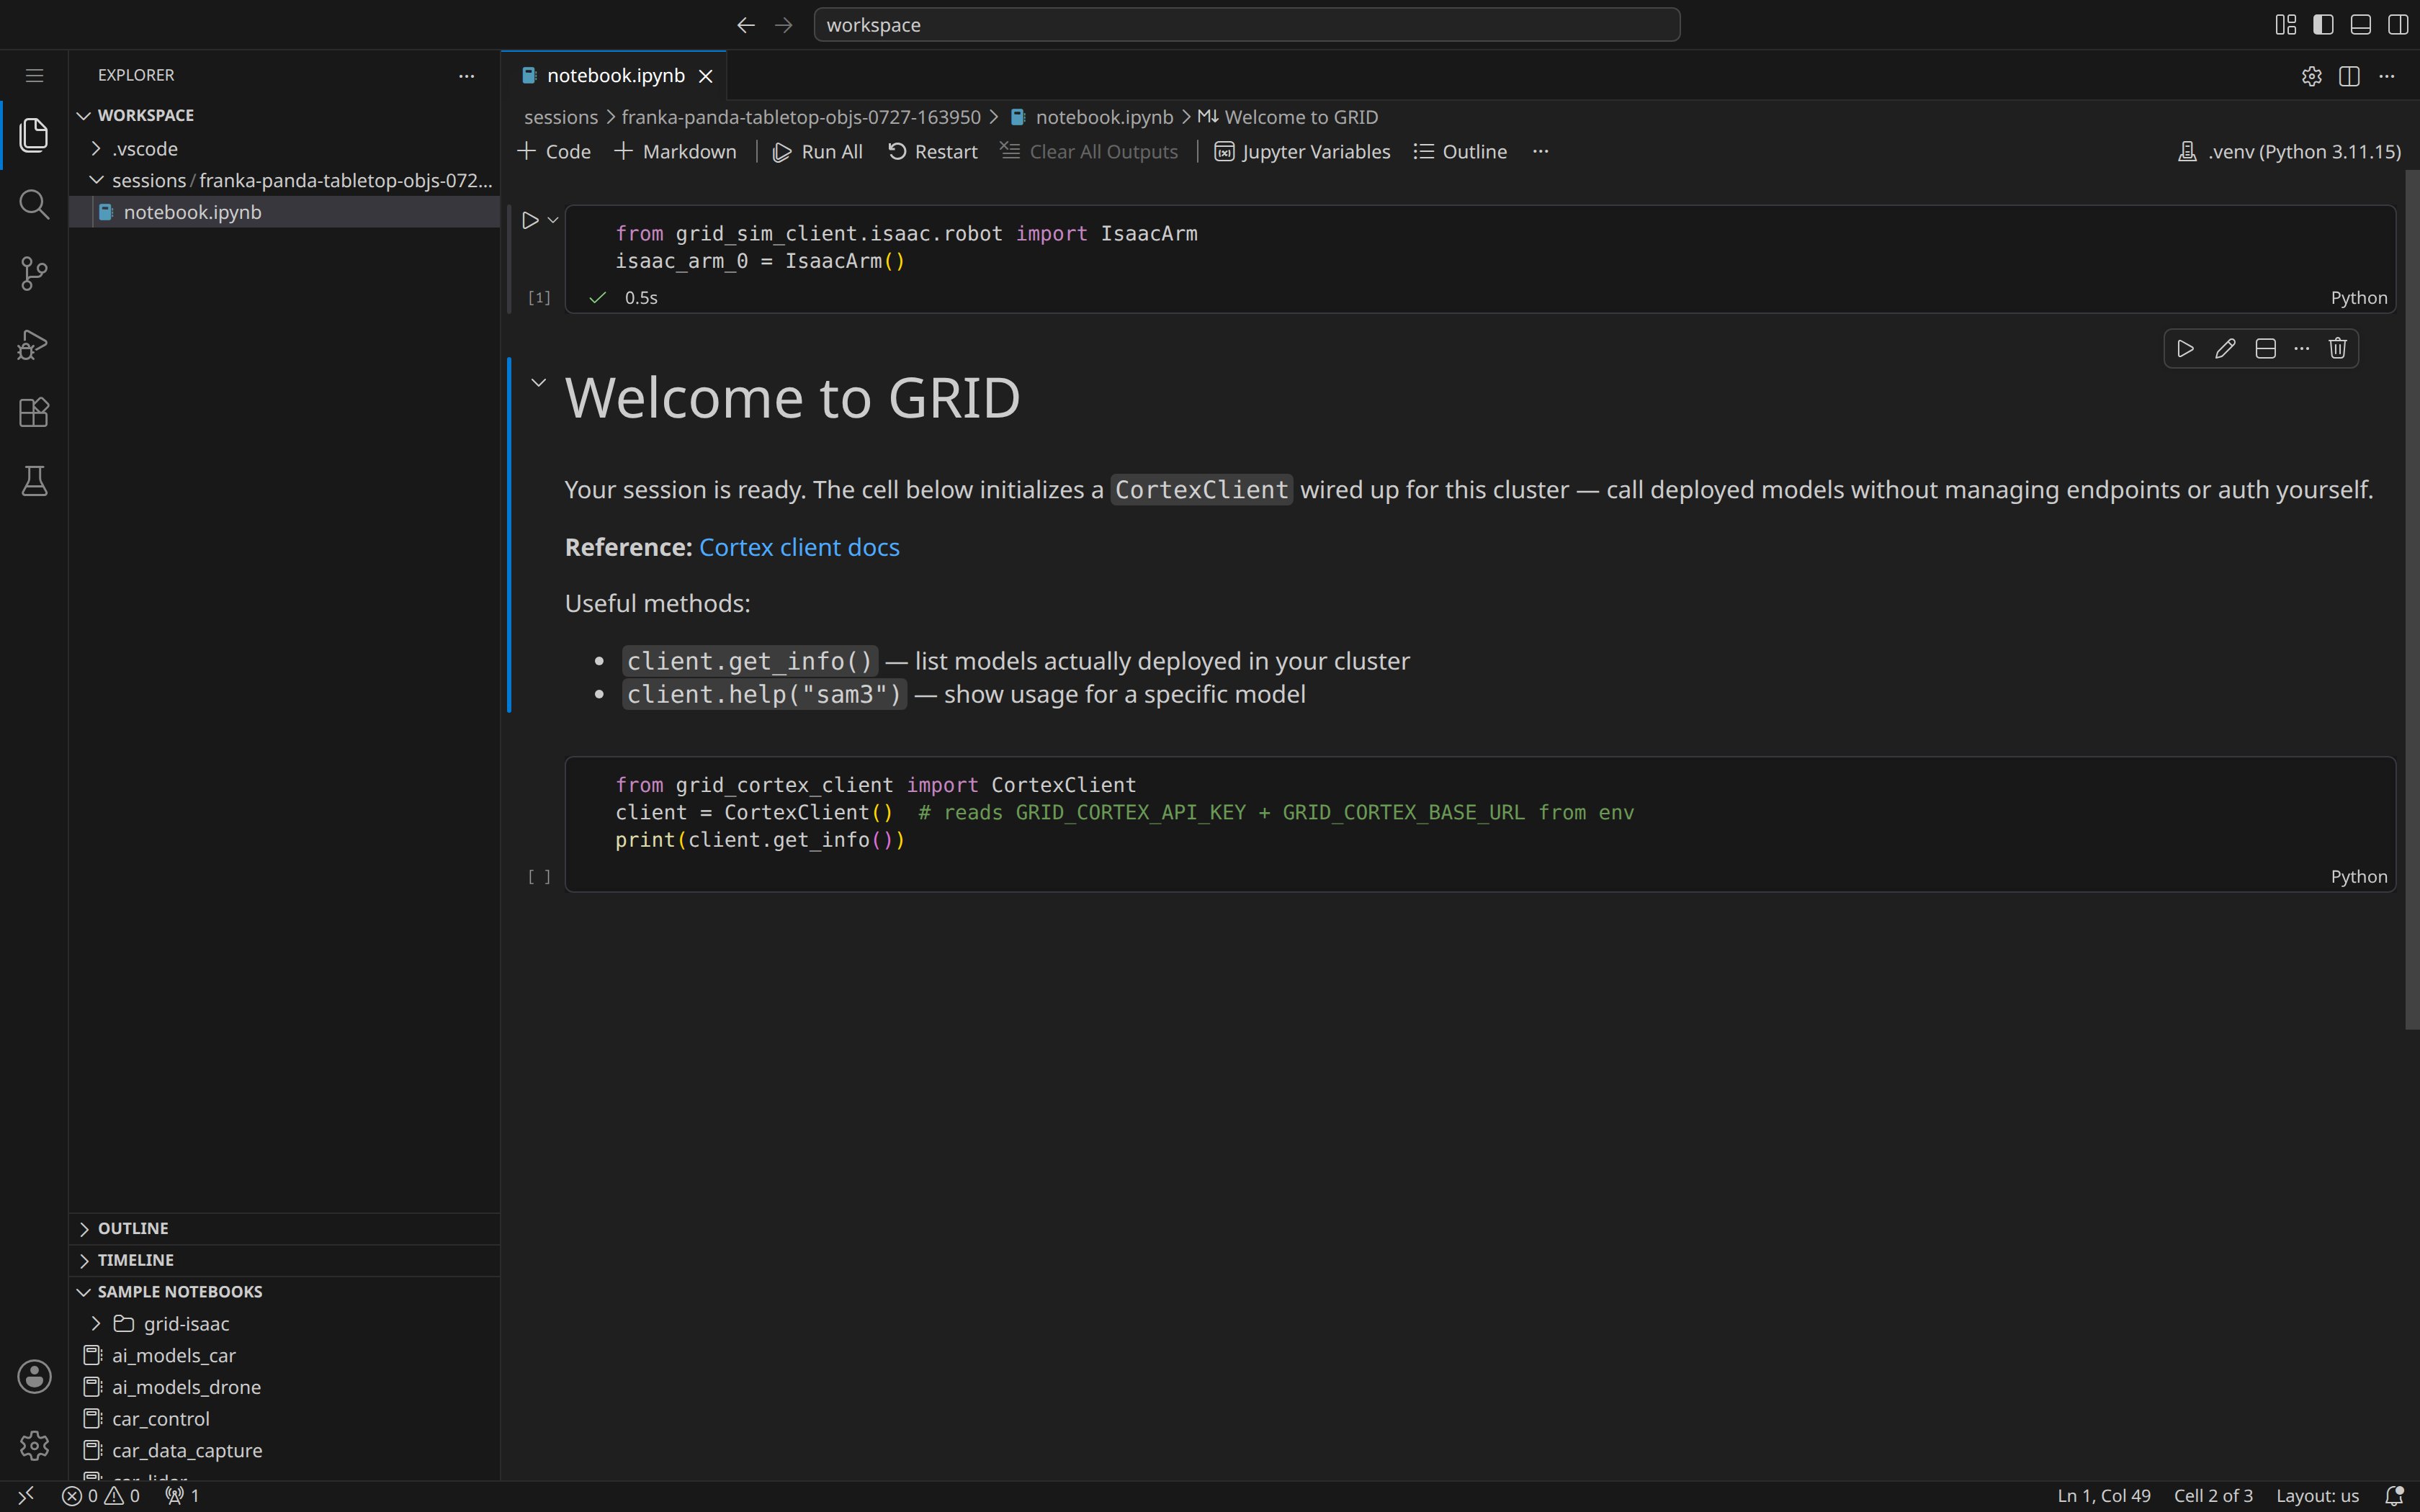
sessions/<session-name>/notebook.ipynb— a welcome notebook seeded for the robot you picked, already open, kernel ready.- Sample Notebooks (bottom of the Explorer) — ready-made notebooks for common tasks; open any of them to explore.
- Sim Streaming and Visualization panels — the live scene view and camera/sensor streams for this session.
5. Do one real thing
Run the notebook’s first cell (shift+enter):get_info() lists the models actually deployed in your cluster, and
client.help("<model>") shows usage for any of them — see the
model catalog and the
grid-cortex-client reference for
what you can call.
6. Housekeeping
Back in the shell (or any new terminal), your session shows up for the whole org:session stop lets you pick from the active sessions and
confirms before stopping. One timing note: the GPU takes ~20 seconds to
return to the pool, so if an immediate restart reports no GPU available,
wait a moment and retry.
If anything misbehaves, three commands have your back:
error— replay the last failure in full detail.diagnostics— bundle redacted logs + config into a tarball for support.debug on— verbose logging with inline stack traces for this shell.
Where next
You have a live robot and a workspace — the next two pages are the same staircase with more weight on it:- Write and save real robot code: Your first skill
- Point it at hardware:
robot addonboards your robot, thensession start robotopens this same workspace wired to the physical machine — see Deployment - Every command in the shell: the CLI reference